The following article explains how to use each data field in the data entry section.
Standard data fields
- Single line text: Allows you to enter information on a single line, i.e. text without a line break. There is no limit to the length. Texts are indexed word by word and can be searched for with truncation on the right. A single line text field is ideal for short, concise information, such as names or headings.

- Single line text (multilingual): Allows data entry in multiple languages. The user’s language takes precedence when viewing a record. The user can set the languages they enter from among the languages defined in the system.

- Multiline text: Like single line text, except that you can use line breaks. Larger input fields will appear in the editor. A multiline text field is good for long texts, such as descriptions or comments.

- Multiline text (multilingual): Similar to single line multilingual text, except that entry can be done with line breaks.
- Simple text (string): Like a single line of text, but the search isn’t divided into individual parts (aka “tokens”). The string is treated as a single entity and searched from left to right. Suitable for example, names, reference codes or anything else that must be searchable from left to right.

- Date: Supports pure years, year + month and year + month + day entries. Negative values for dates before the start of time are also supported. Depending on the language of the interface, the input and storage formats vary. When searching, the broader date and year + month ranges are treated as a period that starts on January 1 and ends on December 31 for the year and from the 1st of the month to the last day of the month. The date field supports different date formats and that the user can pick a date from a calendar.

- Date (range): This type can be used to specify the lower and upper limit (Start and End) of a date. The start and end are optional and means that either the start or end point is unclear. Like date, pure year numbers, year by month, or year by month are also supported. When you enter a date in the “start” field in the editor, the same value is automatically entered in the “end” field (if this field was previously empty), the value can be changed or deleted manually. The date range field is useful for specifying time periods, such as events or projects.

- Date + time: This type also allows you to enter the hours and minutes of the time when entering a date. Saving uses your browser’s time zone. Seconds and time zone (UTC offset) can also be recorded via API. This field is useful when you need both a date and a time, such as times for meetings or events.

- Number (integral): Allows numbers without decimals. Numbers can be searched truncated on both sides in the full-text search. The number field only accepts whole numbers, not decimal numbers.

- Decimal (2 places): For entering numbers with up to two decimal places. Suitable for e.g. sums of money. The decimal number field is good for precise values, such as amounts of money or proportions.

- Double: Floating-point number, IEEE-754 64-bit. The double field is for large or small numbers that require precision.

Note that these fields may be subject to additional restrictions (such as input length or individual constraints).
Others
- File: This is the type of field where CollectionPro stores files. Each file can be saved in different versions, which are maintained internally. CollectionPro creates previews for files and provides format conversions for formats such as audio and video, allowing for direct listening and viewing in a browser.

- Boolean: stores the status of set or not set (Yes/No). The default value in the database is set to Not set. Appears as a checkbox on the interface.

Multiple fields
“Multiple fields” consists of multiple rows of data. Individual rows of data, on the other hand, can contain one or more fields. The mask settings can be used to determine whether the fields are displayed horizontally, vertically, or as a table.
The position of the added rows of data can be changed manually. To do this, use the lines in the left margin and drag and drop to change the position. The new location is saved by saving the record.
A new row of data is created either automatically or by clicking the + icon. Only rows that contain input are saved. Similarly, a row can be deleted using the left-margin trash can.
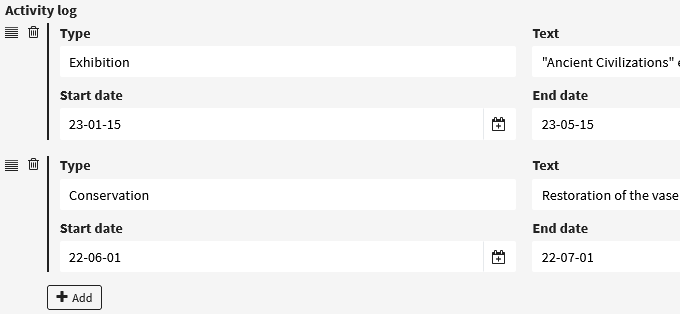
The image is for reference only and may not correspond to the application provided.
Reference fields / Links
In CollectionPro, there are several ways to link other object types in order to use other lists, controlled vocabularies, or thesauri. These are explained below.
Forward linking
When you do not want to use text input, but instead want to use other lists, dictionaries, or thesaurs, select a different object type as the field type, the content of which is thus available in that field.
For example, you want to open a list of photographers so that you don’t have to manually type the photographer’s name every time.
This is what is known as “forward linking.” This means that the photo knows which photographer is linked, but the linked photographer doesn’t know which photos they’re linked to. When exporting photographers, there is no information about the photos to which the photographer is linked.
It is possible to display the images linked to the photographer in the detail view with the link viewer added to the mask.

The image is for reference only and may not correspond to the application provided.
Reverse editing (hierarchy)
This option is available only for hierarchical object types and is located in the “Object Type” tab of the database settings.
Example:
- South Karelia
- Imatra
- Lappeenranta
- Uusimaa
- Espoo
- Hanko
- Helsinki
By default, the entry “Uusimaa” does not know that the entries “Espoo”, “Hanko” and “Helsinki” are below it. Only “Espoo”, “Hanko” and “Helsinki” know that they are under “Uusimaa”. This means that in the “Uusimaa” detailed view, you will not see any submarkings, but only the top entries of the submark.
If you want to see and possibly even edit the “Uusimaa” submarkings directly, you need to activate “Reverse editing” for the object type. After this, there is an automatically created row in the mask that allows which sub-entry information is displayed and/or can be edited.
The data in the sub-entries is integrated into the index of the main entry and is therefore available for search and export.
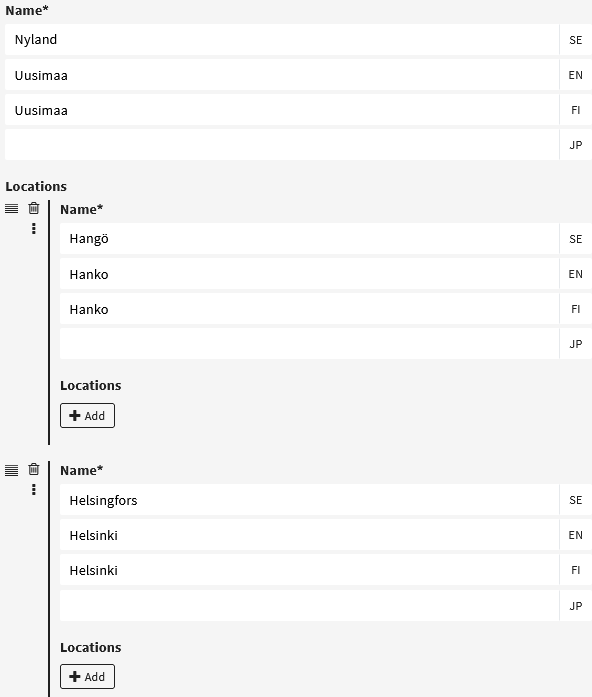
The image is only for reference and may not correspond to the application provided.
Reverse editing (simple)
Reverse editing is used when you want to link two different object types and integrate data from one object type into the other. An example is linking collection objects and photos. Assume that a photo should always be linked to only one collection object, and that a collection object can have multiple photos. Without “reverse editing”, several fields would be added to the collection object with a link to the object type “Photo”. However, this would mean that it would not be possible to see which collection object the photos are linked to. On the other hand, if you include a link to “Photos” in an object type, you won’t see photos in collection objects.
To make this possible, it is necessary to create a simple link field “Collection Object” for the object type “Photo” and activate “Reverse Edit”. This causes the data in the images to integrate with the “Collection Objects” object type. In the collection object mask, a row is automatically created for the photos, which can be used to control which fields are viewed or edited directly in the collection object. It is also possible to create new photos in a collection object and automatically link them to a collection object.
The data for the included object types is indexed and available in search and export (in this case, when exporting collection objects, the photo data is also exported).
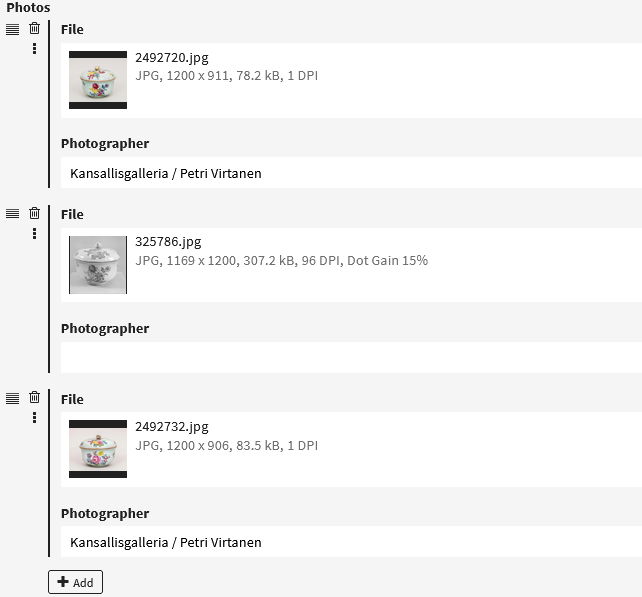
The image is only for reference and may not correspond to the application provided.
Reverse editing (double)
Double reverse editing is used when you want to combine two different object types so that the link can be viewed or edited on both sides. To this end, a so-called connection object type that contains two fields must be created. This may be necessary, for example, with loans. Let’s say we have the object types “Collection object” and “Loan” and we want to see and edit the collection objects that are borrowed in the loan record, as well as see and edit which loan transactions are linked to the collection object.
Example object type “Collection object loans”:
| Field name | Data type | Reverse editing |
|---|---|---|
| Collection object | Link to object type “Collection object” | Yes |
| Loan | Link to object type “Loan” | Yes |
Activating “Reverse editing” for both fields adds a line to the mask that can be used to control, among other things, whether the link is viewable only or also editable.
If you edit a loan and add a collection object to it, the collection object is automatically linked to the loan. The data is integrated into the index of both object types and is therefore also available for search and export.
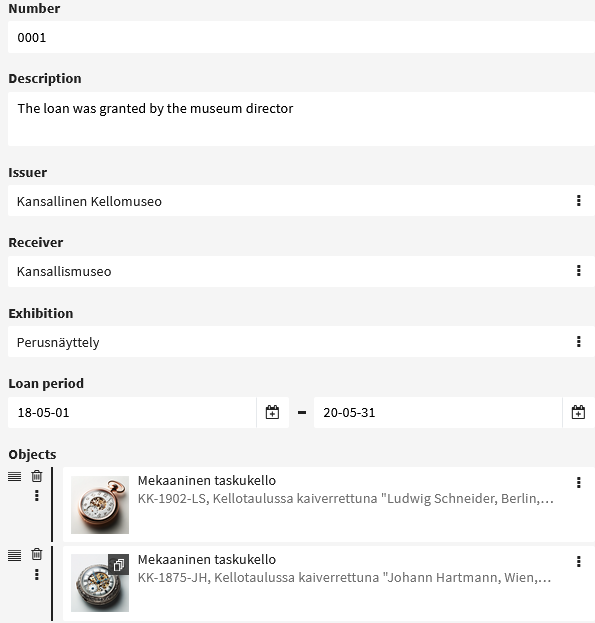
The image is only for reference and may not correspond to the application provided.
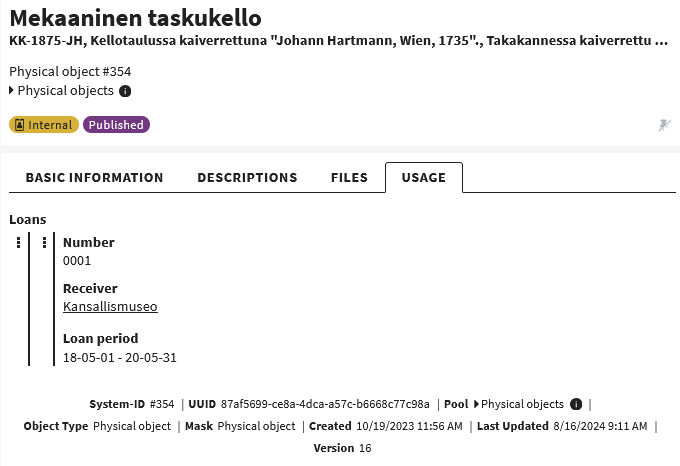
The image is for reference only and may not correspond to the application provided.
Bidirectional
A bidirectional link is available for an object type only when the same object type is linked in multiple fields.
Example: you want to link a collection object to another collection object to store relationships/references between different collection objects.
By default, when linking from object A to object B, only the link from A to B is saved. This means that object B does not know that object A refers to it. Therefore, you must also edit object B and save the link to object A manually. However, this is not controllable, especially with large amounts of data, and is error-prone. Linking can be automated by activating a “bidirectional” field. After this, when object A is linked to object B, a so-called return link to object A is automatically saved for object B. This allows the link to be created from both sides and can be both viewed and edited from both sides, the link also remains in constant sync. If the link contains other fields, e.g. comments, they are saved on both sides.
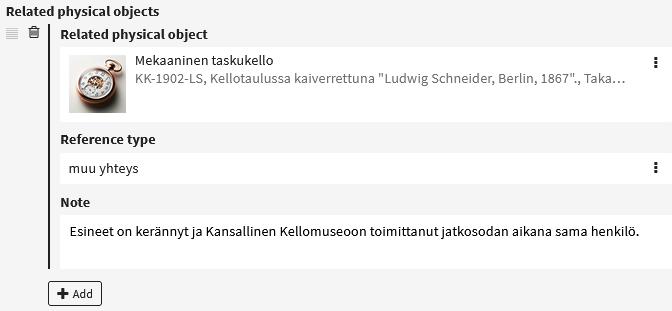
The image is only for reference and may not correspond to the application provided.
Bidirectional reverse
“Bidirectional reverse” only makes sense in the context of a two-way link. For example, let’s take bidirectional linking again (see above), it may be that you also want to give an attribute to this linking of object A and object B. For example, what kind of relationship there is between objects. If we assume that object B is part of object A, this means that object A consists of part object B. So now if this link between object A and B were automatically created using bidirectional linking, the attribute “is part of” would be on both sides. Of course, that would be wrong, and this is where the “bidirectional reverse” type comes in handy.
In the object type used for the attribute (in our example, “Reference type”), you need to define which attribute pairs belong together. In this case, these would be labeled “is part of” and “contains parts”.
Example of the object type “Reference type”:
| Field name | Data type | Bidirectional reverse | Comment |
|---|---|---|---|
| Reference type | Free text | The name of the reference type, for example, “is part of”. | |
| Related reference type | Link to object type “Reference type” | Yes | A reference type that is used in a so-called reverse link, for example “contains parts”. |
“Reference type” markings:
| Reference type | Related reference type |
|---|---|
| is part of | includes parts |
| includes parts | is part of |
If the link type “is part of” is selected in a bidirectional link, the link type “contains parts” is set automatically when the so-called link type is selected. The return link will be saved.
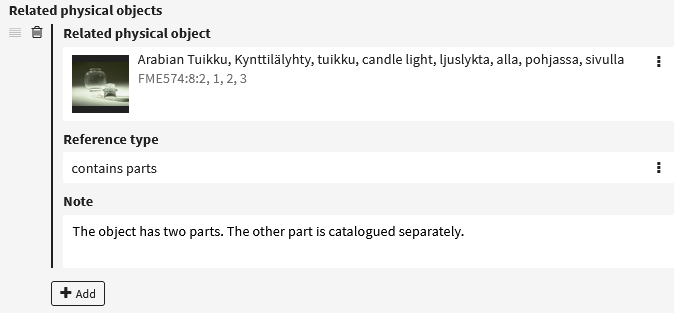
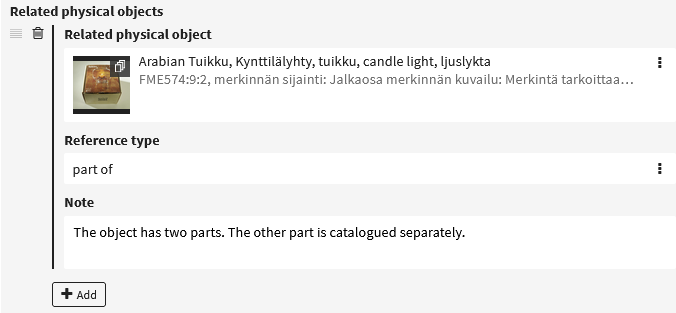
The images are for reference only and may not correspond to the provided application.

