

These short instructions serve as your first guide to CollectionPro. The short version contains the most frequently used functions of CollectionPro, from logging in to downloading the first file and further use of contents. You can find more detailed instructions in the user guide.
CollectionPro is accessed with a web browser. All you need is a working internet connection and an up-to-date browser. We recommend using the latest Google Chrome browser.
Logging in
In most cases you are prompted with a login screen when accessing CollectionPro. Simply enter your login (username or email) and password to access CollectionPro. Depending on your permissions, you are able to search for records (images, videos, audio or office files, …), edit records, upload files or download and export data, and much more.
Depending on the configuration, some CollectionPro instances don’t require a login to access data. You will then land directly in the search, where you can search and view records. Sometimes you can also register to gain access to more data or functions.
The login screen can be individualized in the base configuration (for example: add background image or a welcome text) or in the messages (for example: add terms & conditions).
User interface
The general layout of the interface is always the same. On the left is the navigation, followed by the quick access menu and main search area, and on the right the detail/edit view. In the top right-hand corner is the user menu, where you will find your exports, user settings and language settings.
| No. | Area | Function |
|---|---|---|
| 1 | Menu | By clicking on the small arrow at the bottom, the menu can be opened for full display. Depending on your permissions, you can access different parts of the application here, such as the user management, the data model or the CSV Importer. |
| 2 | Quick access | In the quick access you can create collection to save records for later use. Collections can also be shared with others. You can also find your saved searches in the quick access. |
| 3 | Search | Use the fulltext search, expert search or filters to search for records. You can change the layout of the search results or change the sorting. Click on records to view all the details and right click for more options, such as download. |
| 4 | Detail / Edit view | By clicking on a record in the search (or using a right click) you can see a preview of the record file and all the metadata on the right. Depending on your permissions, you can download/export/share the record or you can switch to the edit view and modify/add data. |
| 5 | User menu | In the user menu you will find your profile, where you can also change your password, language settings and your exports, as well as other useful links such as this documentation. |
A welcome text can be added to the search using the messages. The layout (for example the width of panes, search result view, open/closed menu or filter) will be automatically saved in the user preferences. Use the user settings to set default values for new users.
Search
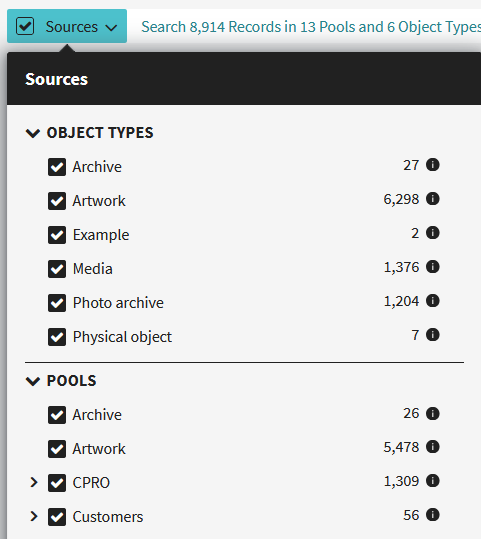
The most space is reserved for the search, which contains the “Sources”, the fulltext search, the expert search, the filters and the search result.

The “Sources” define the data set for your search. Think of it as folders on your computer, where you can choose which folders to include in your search. This is a great way to make your first selection from the data set you are currently interested in.
Then use the fulltext search to search for words, numbers or phrases. Enter one or more search terms and press enter to start the search. The application will search for the terms in all fields in the records (which are included in the fulltext search). All terms are automatically truncated from the right, which means that “house” will also find “houses”, “houseboat”, etc. Alternatively, you can use an asterisk (*) at the beginning or end of a word. To search for exact terms, wait for the autocompletion and then choose “Exact match” or use single quotes. Put words in quotation marks to search for the whole sentence (meaning the words must be in exactly the same order for a match).
Use the expert search to search for terms in specific fields or for technical data, such as filetype or file size. As long as there are records in the search result, you can use the filters to refine your search.
Search result
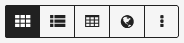
The application offers different search result views like “Standard” (focuses on the preview images), “Text” (focuses on the metadata) and “Table” (displays the results as a table). Each view has several options, such as preview size, layout or how many results per page to display.
By default, the most recent records are shown at the top. Each user can change the sorting and display the results in the order they prefer. The application supports up to three sorting criteria as well as sorting of technical data such as file size or file type.

If you want to perform an operation on multiple records, such as downloading or editing them, you can select records using the lasso (left click + hold + move the mouse) or by left-clicking on records while holding down the CMD (Mac) or CTRL (Windows) key.
View & Download
Once you have found the records you are looking for, click on one to see its details in the right-hand panel.
Use the mouse scroll wheel or the“+” and“-” buttons in the preview to zoom in on images, or the “play” button to start a video. Use the “expand” icon in the top right corner to open the record and file in full view.
Depending on the settings, you can open a map with the image positioned on it (provided that the image has GPS coordinates in its metadata).
If you have the necessary permissions, you can easily download the file by clicking on the “Download” button at the top of the detail view. Choose between the original file or automatically generated previews.
Export
Depending on your permissions, records can be exported in CSV, XML and JSON formats. Simply right-click on a record or use the menu in the detail view and click “Export”. You can also select multiple records in the search and export them all at once. Exports can be scheduled and will then be executed automatically (and sent by email or to a FTP server).
You can access, modify and download all your exports in the user menu, located in the top right corner.
Edit
When viewing the detail of a record, switch to the edit view if you wish to make changes or click on “Edit Record” in the context menu of the search. Here you can update the metadata or modify the file(s) if you have the necessary permissions. Each save creates a new version of the record, which can be viewed in the change history.
To add new files or create new records, click on the big plus button on the top of the main menu (if you have the necessary permissions). Drag and drop or select the files you want to upload on the left. On the right, select the right object type for your records and the pool in which you want to create them. To extract IPTC/XMP/EXIF metadata from your files, select the appropriate metadata mapping profile (if configured). Depending on the data model, the application can also detect versions (same filename but different filetypes) and series (same filename with an index number) and can create a single record with all files instead of creating a separate record for each file.
Upload
Once the files have been uploaded, you can go to the next screen and enter the metadata. Everything you enter in the template record will be written to each record displayed below. To change/modify data for specific records, simply click on a record in the list on the left. You can also open a file preview on the right for zooming. Fill in at least all mandatory fields.
Sharing
The application allows users to share records with others, provided they have been granted the necessary permissions. To share a file, select a record and use the share option in the detail view, or create a collection of multiple records you want to share.